Pages

Monday, December 31, 2012

Blue-tongue lizard in the garden

Look who visited our garden today.


Blue-tongue lizard
The tongue comes out for a second as the lizard is trying to scare me away.


I only noticed it as one of my dogs, Tina was barking at something and she took up a stance as if wanting to scare something away.

Well, I thought there must be something there.  Indeed a blue-tongue lizard was hiding between a tomato and a borage plant.   It was very frightened, kept on hissing at me.  Tina must've scared it with her loud barking.

We do have a resident lizard; it's usually out at the front in good weather, and overwinters inside the fence underneath some large boulders.  But I've never seen it around the veggie beds during day time.  And I'm not sure if it was 'our' lizard or a guest.  It looked a bit younger than ours, though it's hard to tell.

We put water out in a shallow plate, but the lizard just wanted to get away as quickly as possible.

Here is a little video (sorry about the quality!), it shows how frightened the poor thing was:


So I left the lizard alone, but couldn't resist this last little recording as it was hurrying away to hide under the weedmat:


It's not good though, we can step on it while it is there.  I will have to secure the edges of the sheet later.


Have a great new year lizard, safe from dogs and cats!


Saturday, December 29, 2012

Green smoothie


On my first day of 'I really want to lose weight' program I had my green smoothie prepared.  I enjoyed it in three instalments.  It is very filling.

I didn't want to drink too much in one take as it would've expanded my stomach too much.  And I want just the opposite, don't I?

I think it contains most, if not all the nutrients I need.  One other thing I thought I might put in next time is a spoonful of lecithin, because of the egg and the fat in the smoothie.

I used the best ingredients available for me; my own greens (a mixture, and I will try to use different ones each time); organic or biodynamic apple; cold pressed, extra virgin coconut oil; my own sour milk from raw organic fresh milk; raw egg from my chickens; organic molasses; unpasteurized raw honey.

I would not use raw egg or milk from an unreliable source.  I would also not use fat which is not good quality as it would have the opposite effect to what I want.  Pasteurized honey would be more like sugar, missing the enzymes.  Apple, because I eat the peel as well, must be organic, but juicing apple (have some blemishes) is perfectly fine, and they are less expensive.

Other greens I can use at other times: parsley, celery, other types of lettuce (except iceberg), gotu kola (the arthritis herb), brahmi (very bitter, but good for you), rocket, cress, watercress, dandelion leaves in spring, chicory leaves, silverbeet, spinach, turnip leaves... and I am sure there many more still.

Instead of the sour milk I could've used some kefir, but not pasteurized normal milk.  Maybe some good quality cultured yoghurt.

Here are the ingredients I used today:


Today's Green Smoothie

200 ml sour milk
1 raw egg
small tbsp honey
1 tsp molasses
1 heaped tbsp coconut oil
4 kale leaves
half a mignonette lettuce
couple of red lettuce leaves
2 large radicchio leaves
3 comfrey leaves
1 apple


I washed all the greens and the egg.
I put in the blender the sour milk, the honey, molasses and the egg.


Then a heaped tablespoon of coconut oil.


Then I added the greens, removing only the thickest part of the stalk on the kale leaves.


The blender had plenty of room still (1.8 litre capacity), so I though let's add some more greens.


I picked some comfrey leaves in the garden. Washed them and in they went.


There was still plenty of room for more, but that's enough now I thought.


I briefly pressed the pulse button 3-4 times, and the blender sucked the greens down very easily.  (I was worried the liquid wouldn't be enough for that.)


Then I pressed the 'On' button, and let the machine run for half a minute to liquidize the greens.  The result was okay, but tiny green particles were still visible.    I decided that was just fine with me.


So added the last ingredient; the apple, seeds and all, only I cut it into eight pieces.


And that's when I realised that I hadn't paid attention to the speed dial at all.  It was on just above 2 the whole time.  So I turned it to 3.5 and did a half a minute last blending.

This was the result:


Well, it is not a Vitamix, but I am pretty happy with the result of this machine, for the fraction of the price (and a glass jug!) of the other.

My juice was really smooth (although I am not that fussy, it's only that the nutrients would get absorbed better this way), it was tasty and filling and surely very healthy.  What more would I want especially when on a diet?!


Friday, December 28, 2012

Ravioli or “Derelye” with soft cheese and smoked bacon


This again is a traditional pasta dish, made with a special soft cheese, similar to cottage cheese or quark.  In Australia this type of cheese is called farm cheese.  The name of the dish in Hungarian is ‘Turos derelye’.  Usually follows a rich meaty soup as the second course.  Yesterday we had Gulyas Soup and we followed it with this ravioli.

Easy to make, especially when using machines like I do.

Ravioli with soft cheese and smoked bacon


Ingredients:

320 g soft cheese
1 egg
salt to taste


pasta dough from 500g flour (recipe here)
5-6 slices of smoked fat bacon
fresh sour cream

This amount makes about 45 raviolis.

Directions:

Make the filling by combining 1 egg, salt and the cheese.


After resting the pasta dough in the fridge, roll it out using a Marcato-type machine.
I went to size 6 thickness with mine, and the width at the end was about 10cm (4inches).


Lay out a sheet of pasta.  Take the cheese and using a teaspoon, place little mounds, the size of a small walnut evenly (about 10cm distance) on the pasta sheet.
Now take another sheet - try to match one with similar length and width.  Starting at one end slowly lower the cover sheet while pressing it down after each mound of cheese.


Then press around the fillings to seal the pasta around them.  Don't worry much about the outside edge.  Cut that nicely with a pasta cutter leaving about 2-3 cm (half inch) edge around the filling


Then cut between the fillings to make separate squares.


Place the ravioli pieces on a cloth while you prepare the next step.

At this point you can decide if you want to freeze some of your ravioli.  In that case I suggest you dry them on the cloth for about an hour on each side (turn them over) then pack them with paper in between and without touching each other.) They are almost as good as the fresh ones.  When cooking, no need to thaw them, just drop them straight into boiling water.  Cooking time is about 5-6 minutes. 


For the pasta, in a large pot, put water with a bit of salt onto the stove.


Chop up the bacon into small cubes.


Fry in a pan on moderate heat until crisp and browned.


Scoop out the crispy bacon and put aside.  Reserve 2 tbsp of the bacon fat and put in the bowl which you want to drain your pasta into.

Now it's time to cook your pasta, if the water is boiling.
For this many pasta you you need to cook them in batches.  I did 17 pieces in one batch and luckily only broke one ravioli.  So considering the size of your pot; let's say don't put more than 15 pieces in a 5 litre pot of water.


 Cook the pasta for about 4-5 minutes.  You can check by taking out one pasta square with a wooden spoon, cutting off a piece around the edge and see what colour it is.  If it's whitish in the middle, it needs more cooking.  If even colour all through the cut surface, then it's done.


Drain and put the ravioli onto the bacon fat, carefully turning them in.  Then pour over some sour cream and top with the crisp bacon.


At the table serve with extra sour cream and bacon crisp (if you have any more).


Pinched pasta for soup


This is best used fresh.  Usually only a small amount is needed so I make this when I make pasta dough for other use and I just tear off a small amount of that.

The best to make a hard dough so no oil or water among the ingredients.

I use a breadmaker for making the dough, but someone with strong hands it is quite easy and simple to make it by hand.

Put in the breadmaker

5 eggs (60g each)
tsp salt

carefully mix with a fork
then add

350g plain flour
150g semolina (the two mixed previously in a bowl)

Then switch on the Pasta Program.  Mine is 14 minutes in my old Breville.
I stand around with a spatula and a bowl of flour.  It needs a bit of helping with the initial blending (or maybe I just can't resist to poke it all the time), and could need more flour.
You want to make the dough hard but not brake the machine of course.

This is how it looked like after the first cycle on the 14 minute Pasta Program
When the cycle is over, I put it through the same 14 minute program once more.


For this pasta the dough doesn't need resting.  I tear off a piece and pinch off little pieces.  The size is about like these.  I put a fork next to them for comparison:


And that's it, really.  Cooked for about 5 minutes in a soup.


Gulyas Soup


There are some confusion about gulyas soup.  What people usually refer to as gulyas is usually a stew with little juice.  Well, that is NOT gulyas, that is either paprikash or porkolt.  They are both made with lots of paprika and the ingredients are only onion, paprika and salt, meat or poultry and maybe a little tomato and capsicum (pepper) when available. 

Gulyas (soup) on the other hand is, well, actually a soup. 

It does start out as if it was going to be made into a beef stew (porkolt or paprikash).  But then, when it is about half cooked, soup vegetables, potato and other seasonings are added along with a jug of water. 

It is similar to many of those rich oriental soups with vegetables, meat and pasta, except the taste is different.   It’s more “paprikashy” with an added flavour of bay leaf.

We had this yesterday, so I made a few pictures and now here is the recipe.  The meat and potato can be more or less, depending on taste, the important thing to keep in mind I think is that we are making a soup.  

The paprika is not the chili pepper but sweet paprika, I think the Spanish make it, too.  I put in a teaspoon of hot paprika, too, but it’s not important if one doesn’t like it hot.

Traditionally this soup is made with rendered fat (pork or poultry), but good quality oil is fine of course.  I used duck fat this time.  With fat it really is the quality what counts health wise (and other wise) and not the type, but that’s another story.

Gulyas soup usually comes with some pasta cooked in it; because of the way that pasta is made I call it ‘pinched pasta’.  Also, it is often served with a slice of sourdough or ciabatta-type bread.


Gulyas soup


Ingredients:

2 tbsp good quality oil or other fat
1 medium onion, chopped
1 tbsp sweet Hungarian paprika or similar
little hot paprika or chili to taste (optional)
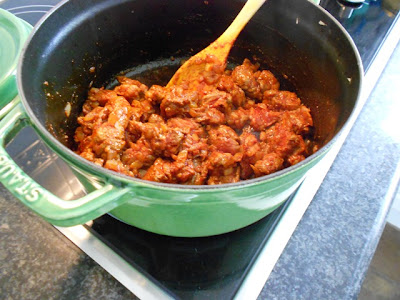
3-400 g beef chuck
salt to taste
1.5 litre of water (or more)
2-3 bay leaves
1 tsp caraway seeds (whole or ground)
2 large carrots
1 parsnip (Hamburg parsley root if available)
4-500 g potato
½ sweet capsicum (optional)
1 medium tomato (optional)
½ Celeriac or 1 celery stick with leaves
1 bunch of parsley
small handful of pasta (recipe in next post)


 Directions:

Chop the onion and fry in the fat for a couple of minutes.  


Dice the meat into about 2cm cubes (or 3/4 inch). 


Add the sweet paprika and stir it around for a second or two.


Add the meat quickly (you don't want to burn the paprika) and stir it around to brown the outside, not for long, maybe around 3 minutes.


Now add the water and the salt.  You don't need to add all the water now, you can top it up later.
Also add the bay leaves and the caraway seed.


Cover and cook for about 45 minutes or until half cooked.


In the meantime wash the vegetables.
Cut the potato into 2cm (3/4 inch) cubes,
slice the carrot and parsnip (or small cubes of celeriac if using),


tie the parsley and celery.  You can slice the celery stick if you like it.


Add all the veggies to the soup, together with the capsicum and tomato if using.
This is a good time to check for saltiness and adjust if needed.  If too salty, don't worry the potato will soak up some of it.
Cook the soup for another 40 minutes.


Add the pasta and cook for another 5 minutes or if using commercial pasta, then according to instructions.


When it's all done, fish out the tied greens, the capsicum, the tomato and the bay leaves.  Discard.


Serve the soup hot.  Some people like to eat some bread with the soup, so offer fresh sourdough or ciabatta.
Good appetite!


Thursday, December 27, 2012

Pictures of my first garden


The backyard when we moved in.
We had the typical Aussie backyard to start with.  Grass, Hills hoist and a lemon tree.
Luckily, there was also a cute little house, very well built, which was used as a cat house by the previous owners.  That later proved to be a perfect little chook house.

It's weekend time, get the Victa!
While thinking about and planning our veggie garden, my husband had the pleasure of mowing the grass on weekends.
Why didn't we think of saving all that grass mowing for later, for the building of the beds?


soil, compost and worm castings waiting for their turn
 Then, one day we had lots of soil, compost and a special addition: worm castings delivered.  The building of the veggie garden had started.  We were learning as we went on, as we'd never done anything like it; having been always apartment dwellers.
 I was reading about no-dig gardens (wonder why that appealed to me?) and permaculture principles.  That's what we wanted to apply at our place.

stacks of newspaper being soaked in the wheelbarrow

So first we put down wet newspaper, several sheets thickness.  I didn't want straight edges, but curvy ones and optimize the area for planting.


Something like this.  The paths were covered with wood shavings.  The plantings were mixed even with flowers among the veggies.   Surprisingly lots of plants could fit in as by the taller ones we put in small shade loving ones and next to the slow growing ones went in quick ones like lettuces which would be gone by the time the big ones grew big.
Permaculture is a great system, and there are lots of  books about it with detailed, well researched instructions on how to go about it.


The newspaper layer was covered with soil and decomposed manure.


Next a layer of thick straw.  Sprinkled that with Dynamic Lifter  which is a complete natural fertilizer, and watered it down.

The hat was a present from a friend with Vietnamese origin.  It seems to be a military hat, I hope it will not offend anyone.

Onto the straw was put another layer, this time a thick layer of compost.


advanced seedlings planted

On the very top we laid biscuits of lucerne hay to completely cover everything.

When planting the seedlings, we made a whole into the hay which was about 10 cm  thick, put in a couple of handfuls of worm castings, and planted the seedling into that.  We did the same for each seedling.
They were doing very well.  But only seedlings or plants; we had to wait for next year to sow seeds.  By then, most of the layers would brake down into a compost-like  material.


The boys also started on the chicken run; to build a fence around the lovely little green house.


As you can see, it was all very professionally done!

Kookaburra

And look who was watching the whole time!  A regular visitor.